Sunday 31 May 2009

Refference filming


A few weeks ago ( i forget the exact date) Anja and i came to college to film the references for several animation scenes so that anja could see how the human form works perfectly and create the best possible animation.

The girl that was asked to act out the role of Sadako, the films central character, is a Broadcast Post Production student named Kozue Sufu. She was chosen by anja due to her possible resemblences to Sadako Sasaki and due to the fact that Anja wanted a Japanese person to oversee the film a tiny bit (coincidentally Kozue should be helping me with post production on this movie) so that she could get the right feel to the movie.

We took many Photographs, some that I will upload shortly once i obtain them from Anja, we also filmed the Run and the Jump and even acted out almost all of the scenes from the movie, including the mourning scene where I had to act out the role of Sadako's 4 family Members.

Overall the references we took that day have been of a great use to Anja over the course of animating as it has given her the chance to really study the human body and its movement (something as im not too good at actually...) and create the perfect animations.

Group Tips [We learned together so we share together]

Dan: This is just a few tips for the group, some are mainly for Anja whilst others are for Heba and some for both myself and Simon

For the Bomb scene possibly try to triangulate the scene as this should get rid of some of the bad geometry, though this can also make some worse geometry...but at least it connects everything together and cause the scene to run a little faster. Also Cache some of the particles if your happy with it, that way you can cache the particles from one building and then work straight away on the others without effecting or having to recalculate that building.

Anja: The geometry got complex, because I modeled some scenes with the help of Adobe illustrator, trying out the fluidity between adobe and 3D software. Once the illustrator files were imported into Maya, they were turned into the curves and then converted into polygons. I did Quadriculate them (this is because it gives much smoother surface and it affects the way light huts the surface). Afterward Charley converted the objects in the bomb scene into triangulate objects in order to do dynamics.

Clock Tree's Scene, well this is my scene to animate, and although it would have been horrible to rig due to the topology if i had cleaned it up this could have been better then bend deformers with a controller.

Animation:

This is mostly for Heba as Anja is a veteran 2d animator.
Try to draw just the outline when starting the animation as if the animation doesn't flow or things aren't correct then no time has been wasted adding the tiny details.
Also if the 2 wings of the crane are to animate identically then its best to just animate one and then once its colored and scanned in just mirror the animation as this should save time as it is difficult to mirror things perfectly by hand. I know it does seem a little obvious and common sense...but when i was in the 1st year i didn't know much about 2d animation and i was just redrawing eachframe for hours just to discover it was wrong and that id wasted 4 hours. Your work is very good and your working quite fast too.

Anja: Since we havent really animated since 1st year, it is extremely hard to catch up with it. We also encountered hard times working out the animation of a strange angles of a human body or even a bird animation. In this respect i have to admit I am surprised over the work Heba did. She progressed very fast and her animation of crane flight is really nice.

Dan: I agree with this, due to a lack of Hand drawn animation members of our team have had to begin 2d animation techniques practically from scratch. Though work is still produced at a great rate.

Topology, Although creating things using curves can produce some fantastic results it unfortunately doesn't have any benefits over normal polygon modeling. In a model all vertices and edges should connect to something and have a purpose, otherwise there are often problems with animating, and when using poly's created by curves this can have a huge effect on memory, which is something charlie is struggling with recently, due to Maya trying to calculate what to do with all the excess edges and vertices.

There is also a way Inside Maya to create text, though it does only create it as a curve unfortunately so lofting is just part of the process, though you can change the lofting options so that the polygons that are create are not like this ##### but instead are lower poly and cleaner looking.

Unfortunately it cant be avoided and sometimes it is best to use curves but if you decide to do something this way then you must clean the polygon a little so its less CPU intensive, one or 2 are fine but 9000 would probably cause maya to crash constantly (depending on CPU power and RAM of course...).


Textures:

The textures created by Anja are amazing, they give the film the most beautiful look, unfortunately if any texture is above 4096 pixels by 4096 pixels then Maya starts to crash and freak out. This is due to memory options, and if you convert your textures to.map files then it lowers memory usage and can sometimes GREATLY increase render time, plus it doesn't cause Maya to show multiple warnings when rendering.

Textures for 3d applications should primarily be multiples of 2. starting from as small as 1x1 Pixels.
Below is a quick list showing texture sizes preferred by most 3d programs.
1x1
2x2
4x4
8x8
16x16
32x32
64 x 64
128 x 128
256 x 256
512 x 512
1024 x 1024
2048 x 2048
4096 x 4096
I wont go above that as its rare unless you work for a large company on a big budget movie...that youl need to go above any of these sizes.

The textures don't usually HAVE to be square: they don't have to have the same size in both dimensions. But each dimension does have to be a power of two. So 64 × 128 is all right, for instance, or 512 × 32, or 256 × 256. But you can't make a texture image that is 200 × 200 pixels, since 200 isn't a power of two, whereas 1024 x 32 is (though generally i prefer to stick to square textures myself).


If you create a texture thats say hmm... 9011 pixels in heigh by 11 pixels in width then maya is NOT going to like it as maya WILL most likely crash pretty fast (though if you have a LOT of ram and some amazing HARDWARE then maya will still run, just not as smoothly as it should) as it cant calculate it propperly. This can be a problem and simply converting the file format to .map wont really help here either.

Photoshop textures

Most graphics hardware requires that your texture images always be a size that is a power of two in each dimension. That means you can use any of the following choices for a texture size: 1, 2, 4, 8, 16, 32, 64, 128, 256, 512, 1024, 2048, or so on (but unless you have a really high-end card, you'll probably need to stop there).

The textures don't usually have to be square: they don't have to have the same size in both dimensions. But each dimension does usually have to be a power of two. So 64 × 128 is all right, for instance, or 512 × 32, or 256 × 256. But you can't make a texture image that is 200 × 200 pixels, since 200 isn't a power of two.

To convert a texture from .tiff (or whatever the format) to .map just simply go to the render prefferences (in maya prefferences) and tick the convert textures box.


Note: maya software will NOT read .map textures as .map is purely for Mental ray. To render in maya software you must convert the images from their original format to a .bot format. I am not sure how Maya hardware renderer works so unfortunatly i cannot supply a format for that, but it does reply on your system hardware only so if your graphics card cannot support a texture size then neither can maya hardware renderer.


Large jpegs over 6 meg can sometimes cause problems, for example im using a .tif file that is a total or 60 meg and it DOES cause maya to be a little slower so i decided to convert the file to .map to speed up maya a little.


Photoshop Textures:


For texture creation many people use Photoshop, some prefer to use Zbrush and other prefer to use Mudbox, but most people even if they start in a seperate program, eventually come back to Photoshop to clean their textures.

Photoshop CS4 has a new POLYPAINT ability for 3d, though unfortunatly this does not yet support layers and from my own personal experiances it doesnt look very nice as its in the early stages of development right now.

If you wish to texture an object in either Photoshop or Mudbox or even Zbrush...the object MUST HAVE ASSIGNED UV'S otherwise it will not work propperly and you will get some very ugly results. Also any ramps or anything applied in maya will not work in Photoshop, as the ramp is connected to the material and OBJ export ONLY exports the object and texture refferences, it exports UV's too but not the textures assigned to the UVS.

With an OBJ file there is a .MTL file, this is the MATERIAL refferences file, if you delete this then the OBJ will not know where to collect the textures from and all texture references will be ruined, this however does NOT delete UV's as the uvs are part of the OBJ file and MTL file is just for texture names and references.

On a quick side note...UVS and PSD networks are NOT related...a PSD network assigns a texture and a UV decides the texture coordinates, if the object has bad UV mapping then a PSD network will just look extremely ugly. PSD networks are created for the purpose of testing, so that when yo make a change it instantly updates in Maya, this is a fantastic feature for testing but not for the final result. Once all the textures are finished they should be converted to another format such as .jpeg, .PNG, or any other format you wish. Though PSD networks DO work when you render, but this is purely so that you can view your results faster and not for the final film output.

Anja: The way of texturing we used is with PSD NETWORKS.

Rendering menu: Texturing: Create psd network. Tis is a direct connection between an object and photoshop. This means that We can quickly change the texture, preserve the ramps we made in Maya and also we have much stronger control over anything connected with texture (transparency of teh object for instance).

It does not take any more time that normal texturing, but the problem is that it does not work on some objects with bad geometry (overlapping vertices), these need to be converted to subdivs and once textured- back to poly.

This is primarily for others who view the Blog, as this doesn't effect us as we don't use images Above this size so far as I know.

Unfortunately the MAIN drawback for PSD networks is that you cannot use any texture size, the maximum texture size that you can use in a PSD network is 2-49 x 2048 sized image, as the slider doesn't go any further and entering your own Numbers doesn't work. This image shows what i just explained. its unfortunate really.


Dynamics and particles:

Dan: Once something is finished and perfected with particles or dynamics they should either be Show Allcached (this saves it to memory and makes the file run a LOT faster then without a cache) or converted to keyframes. Dynamics act different upon each individual render so they need to be converted to keyframes and then edited if they arent already perfect. This changes it to an animation and increases both rendertime along with playback and playblast time.

I didnt know about dynamics caching or about converting them to keyframes and this caused a previous project of mine to look different in the render to in the viewport and i got a lower grade for it. I would prefer if my friends did NOT fail or get lower grades or even struggle because of something simple they didnt know, as sometimes when you spend all your time learning complex things...you dont notice the smaller things.


Also...trialgles are important...most renderers and game engines support ONLY triangles, many renderers convert things to triangles upon render to increase render times (im not sure WHY i just know thats how it is) .

On another quick note...Nurbs are good, though according to industry, many professionals only use nurbs in order to convert them to polygons, i have little knowledge of Nurbs but all the professionals ive spoken to for game design have said they don't use nurbs as most game engines don't support it... also many professionals have said that Nurbs are rarely used in the final output of things and 99% of the time nurbs are just converted to polygon objects for further tweaking...also you cant use nurbs in photoshop, zbrush or even Mudbox.

Group dates:

Group Jobs

Heba: 1 - Fix moving hand animation

2 - Finish sadako Tiring animation

3 - Do window behind shot animation

4 - Crane - animate both sides

Charlie - Finish Dynamics

Dan: 1 -Animate the feathers and clock tree's

2 - Finish Ending Credits

Anja : Write exact test so dan can animate the credits ASAP.

Friday 22nd May

Heba: Do the inbetweens, Do the Run -side view

Louis - Animate the Branches

Simon - Finish Fish Animation, Begin crane turning hospital animation

Dan - Finish Animating the CLocks and fethers - They need to move more naturally and slow down

Sound Designer: - Explain changes in movie, decide if voice overs are worth it or not

Anja : Animate more

1: Dying scene

2: Bomb scene, hands with baby

3: Looks upwards

4:Mourning

Animate the Run


Tuesday 26th may

Heba - dO INBETWEENS for window scene!!!

Dan - Clock animation collected, ready to render

Blog updates.


The reason we haven't added to the blog in a while is that we were simply all busy with work.

There are now just under 3 weeks left until the term is over and university is finished and the film has come a long way since the last post, as with all movies there have been a few small bumps in the road but everything seems to have been sorted for now. Some of the problems are due to software, others due to bad communication, whilst other are just as simple as people not knowing the best way of doing things. University is all about learning and experimenting so as a group together weve all slowly progressed through the year.

This post will just be a brief synopsis of the work being produced so far, thought this could be split into several rather large timetable postings...nobody has the time to do so.

What was done so far by whom:

According to BBC Guy's advice we decided to do some minor changes to the story in order to make it more clear. We cut out a lot of running scenes and the main change- we decided to get rid of montage to make time more linear and more understandable for the viewer (so he or she doesn't lose the red line). Richard said we need to make cear what is the character fighting for (to make 1000 paper cranes to be granted a wish and run again), which needs to grow into something bigger- fight for world's peace.
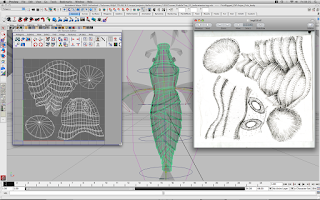
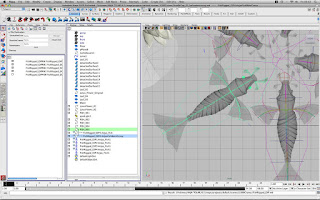
Modeling is done:

AJDIN decided not to cooperate in our group, which he announced at the end of term 2, way too late for the normal flow of the group and just at the time when everyone was busy with dissertation. As a result Anja modelled all the scenes originally assigned to him in a very short time.

All the rest of the group handed in animation in a time decided:

Heba- all the hospital scenes. She did a good job modeling, but forgot to sort out the uv's and did the whole lighting.

Dan- his scene was cut out (the flowerfields, although he tried to model it). Instead of that he did other jobs.

Mehmet- finaished his bamboo bridge scene, a beautiful complex fish eye scene, also cut out later.

Louis: Modeled his Red sun scene surprisingly well.

TEXTURING:

Anja did the texturing of all the scenes. It actually took long to figure out the right way as she wanted to preserve some of the effects like ramps, glows, specular shading, play around different transparencies.

We chose to do everything with PSD networks. We came to conclusion that instead of having all textured with the same white paper (which we tried and looked quite boring), would be better to use different kinds of paper.

It was hard to get all the textures in high resolution, so Anja often photographed them herself.
More about texturing on her blog.
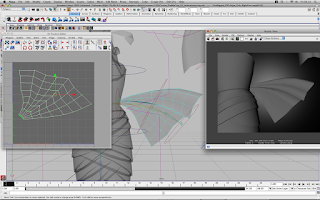
LIGHTING

Anja sorted out all the lighting which was extremely hard job as all is LIGHT LINKED. The reason for that is that she wanted to achieved a certain look which would be more crisp in case of scenes that are going on NOW (at the time of speaking) and the scenes, where the main character is imagining the past events soft lights creating dream like effect of fog and reflections in the water).

A lot of objects (lights in the hospital scenes for instance) are actually enlightened within themselves with the help of glow, incandescence and specular. shading.


RIGGING of 3D elements:

Moe: The 3D fish was rigged very well by Mohammed Warsame. Great job!

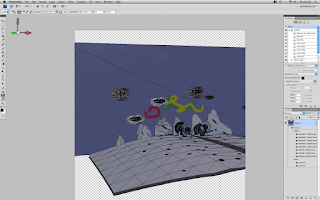
Dan rigged the clocktrees: As Dan put later in the blog- these were really hard to ruig as the geometry isn't too clear, but he succeeded.

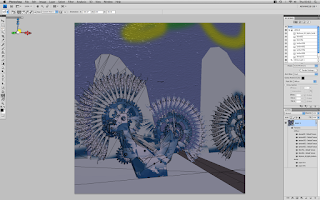
Louis rigged the branches in the Red sun scene... 57 joints in one branch...hmmm hmmmm. He said he will animate them himself and we were all very happy with that. Thanx Louie!

The Lotus flowers in the Puddle scene- rigged by Simon.

3D Animation:

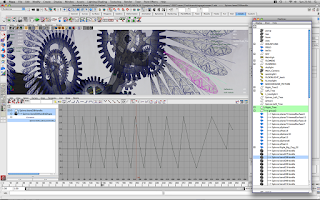
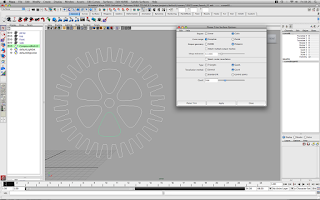
Simon: animated most of the objects in 3D scenes: Fish he animated with the help of the bezier spline, when the object in the scene is animated according to the curve. He encountered the problem when asked to change the timing- the spline deformed. We fixed the problem in the animation editor. Simon animated the reference objects, not the actual obects , which made the scene less heavy and animation thus more efficient.

He also animated the cranes to appear when camera dollys through the room. the cranes are referenced from another scene and all of them slightly rotate in a different way.

Louie animated his branches as perviously said.

Dan animated the clocktrees to run out when the reference object passes by on a bezier curve.

2D Animation :

All the 2D animation has been done by Anja and Heba. To help the imagination, we filmed and photographed the reference. This really helped the perception of very hard to imagine perspective angles and body deformations (shortening,...), to foresee the distances between objects in the backgrounds and to get the general feel.

Anja filmed the references already in a Term 1, but his time her end Dan did it more precise.

INKING:

The most important is not to loose the continuity in the film with binging together two completely different concepts of animation- 2D and 3D. inking needs to be very strong and precise. The edges of the animation refined, so they melt finely with the environment. The sizes of the charecters animated in 2D need to match perfectly with 3D camera moves and textures in 3D environments. In clocktrees scene we decided to project2D animation on an animated flat plane as a texture, so it matches completely. This requires a lot of experimenting.
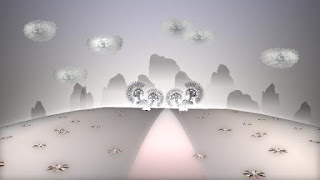
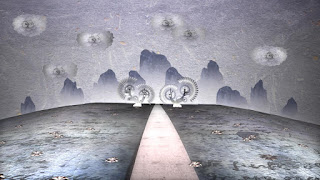
NEW COLOUR FEEL

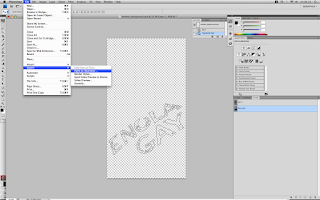
The " real scenes that are happening "now" we decided to do more crisp and clear as the ones where the main character imagines how it was before. The bomb scene from her childhood is therefore black and white with a grainy effects, to look more "imaginary". The hands holdng a child are blue and radiating, which might help to clear the possible confusion who is the child they are carrying (young Sadako and not her baby!).

Wit the coloring of the skin, textiles and hair Anja wanted to achieve the feel of flash, light reflections, the beauty of watercolor technique and make a step closer to Japanese tradition.

All the scenes are based on a contrast between Blue and Red, the symbolic color of geisha. Read about their meanings in older posts on this blog.

Scenes of suffer are more darkish mysterious, the imaginative are more white, virginal, like a clear unspoiled soul of a child, a victim in a war.

CAMERA MOVES AND TIMING:

Before animating Dan and Anja once more agreed on all the camera moves. These were tried out when they did photo and filming reference in the week 3.
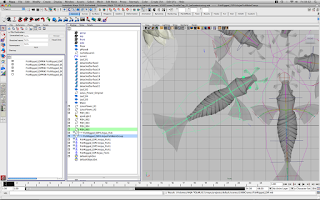
RENDERING

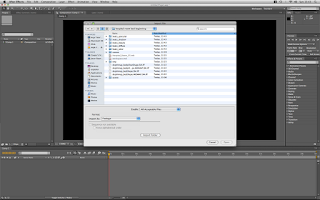
In order to have more control over the objects we decided to render out everything in layers. To do so, all the scene needs to be sorted out, assigned to layers which makes it easier to render them out at the same time.

SPECIAL EFFECTS

Charlie-was trying out really hard for quite some time to animate the city explosion and particle animation in Maya. He was not very successful as the modeling with illustrator left very confusing polygon structure and this one was hard to animate., so we dropped that idea soon.


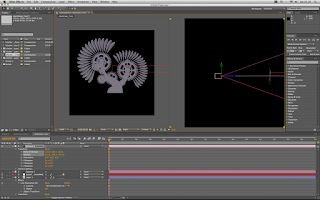
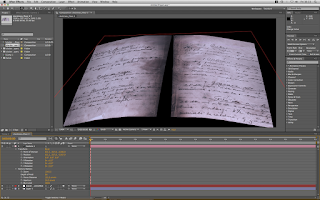
Anja-Instead of him, Anja solved the problem with making the explosion in After Effects. She also find the solution for creating the fog iand reflections in Maya.


POSTPRODUCTION

cutting out the 2D animation and matching it with the 3D appearance

THE SOUND DESIGN

Papery feel, keeping the old melody, surround, new voice over.

THE CREDITS


Here are the timings for the scenes:

Scene 1 - Bed Scene has now been cut from almost 20 seconds to 13 seconds.
Scene 2a - Bomb Scene - 00:30 - 01:02

Scene 2b - Bomb Explosion - 1:02 - 01:15

Scene 3 - Mourning Scene - 01:15 - 01:30

Scene 4 - Closeup eye shot - 01:30 - 1:46

Scene 5 -Window (Side View to back view then Zoom into the Red sun outside the window).

Scene 6 - Running Scene +Red Sun (Distance)

Scene 7 - Puddle (Birds Eye view)

Scene 8 - Jump Upwards (Top view)

Scene 9 - Foot lands in the puddle - View changes to side view

Scene 10 - Jump over the puddle - Zoom out of red Sun

Scene 11 - Return to Window View (Side Angle) - 1:47 - 1:48 (May possibly Change to 8 seconds long).

Scene 12 - Zoom into the Crane

Scene 13 - Crane falls and Sadako Catches it - 02:04 - 02:06

Scene 14 - Sadako with the crane in her hand looks out happily.

Scene 15 - Camera Dolly scene in the hospital with Sadako making the cranes

Scene 16 -Sadako's family stands by her side begging her to rest as she is getting progessivly worse.

Scene 17 - Sadko finishes some cranes but cannot sit up straight any longer

Scene 18 - Clocktree Scene

Scene 19 - Sadako tires and her head begins to fall downwards in a slump

Scene 20 - The clocks stop as Sadako PASSES( symbolising the lack of time left for her)

Scene 21 - Camera zooms out of the Crane in Sadakos hand and the viewer can see she has passed away

Scene 22 - A shot from underneath a flying crane.

Scene 23- Inscription- a campaign against atomic weapons.